I may earn a commission at no extra cost to you. #ad
Step-by-Step Guide: How to Display Sonogram Photos at Your Reveal Party
Jump to Section
Your baby's first "portrait" is more than just a medical image; it is the centerpiece of your journey into parenthood. When it comes to a gender reveal party, displaying these sonogram photos provides an intimate connection between your guests and the life you are celebrating. However, because ultrasound paper is delicate and the images themselves are often small, it takes a bit of planning to showcase them effectively.
In this guide, we will walk you through the essential steps to prepare, protect, and creatively present your sonogram photos so they become a highlight of your event decor.
Preparing Your Sonograms for Display
Before you start buying frames or hanging ribbons, you need to handle the physical photos correctly. Standard ultrasound prints are produced on thermal paper, which is highly sensitive to heat and light. If you simply tape them to a wall, they can curl or fade before the party is even over.
Step 1: Digitization. The first thing you should do is scan your sonograms at a high resolution (at least 300 DPI). This allows you to print them on high-quality cardstock or photo paper, which is much more durable and can be enlarged for better visibility.
Step 2: Enhancing the Image. Many ultrasound photos are dark or grainy. Using a simple photo editing app to slightly increase the contrast or brightness can make the baby's features pop, making it easier for guests to see what they are looking at from a distance.
Creative Display Ideas for Your Party
Once you have your prints ready, it's time to get creative. Here are some of the most popular ways to display sonograms at a reveal party:
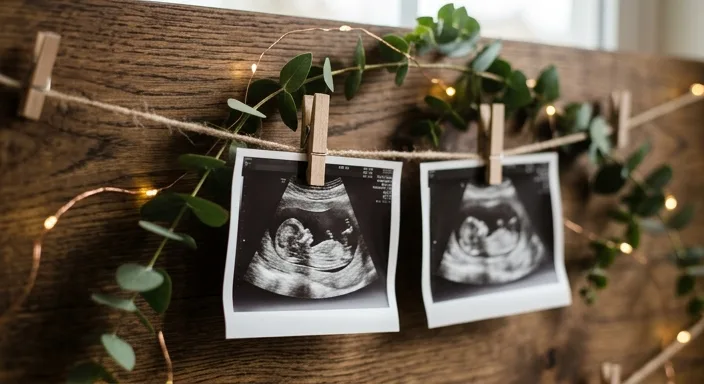
- The Clothesline Display: String a piece of twine across a mantel or between two trees. Use miniature clothespins to hang a series of sonograms showing the baby’s growth from the first trimester to the most recent scan.
- The Family Tree: Place a decorative "tree" (made of branches in a vase) on your welcome table. Hang your sonogram photos from the branches using silk ribbons.
- Shadow Boxes: Create a 3D display by placing a sonogram in a shadow box along with a pair of baby booties or a small stuffed animal. This serves as both party decor and a permanent keepsake for the nursery.
- Table Centerpieces: Place framed sonograms in the center of guest tables. Surround them with flowers or "pink or blue" confetti to tie into the theme.
The Importance of Protecting Original Prints
It cannot be stressed enough: never laminate your original sonogram photos. Because they are printed on thermal paper, the heat from a laminator will turn the entire page black, destroying the image instantly.
If you want to use the originals, place them in UV-protected glass frames. This shields them from the fluorescent lights or sunlight at your venue. For most parties, we highly recommend using high-quality copies for display and keeping the originals safely tucked away in an acid-free photo album.
DIY vs. Professional Display Solutions
Choosing between a DIY approach and a professional service depends on your budget and time. DIY solutions, like the twine and clothespin method, offer a charming, "Pinterest-style" aesthetic that is very cost-effective. You can pick up materials at any craft store for under $20.
Professional solutions might include ordering custom large-scale canvas prints of your ultrasound or using digital photo frames that cycle through all your ultrasound images on a loop. Digital frames are particularly effective because they can handle "4D" ultrasound videos, allowing guests to see the baby moving.
Integrating Photos into the Big Reveal
Why stop at decor? You can make the sonogram a part of the actual reveal moment. Some parents choose to have a "hidden" sonogram—perhaps a 3D image where the baby's gender is visible—placed inside a "Reveal Box" that is opened at the end of the party.
Another idea is to include the sonogram on the "Guessing Board." Guests can look at the baby's profile (some believe in the "nub theory" or "skull theory") and place their vote for a boy or girl based on what they see in the photo.
Frequently Asked Questions
Can I use 3D or 4D ultrasound photos for my party?
Absolutely! 3D images are often much easier for guests to understand as they show realistic facial features. 4D videos can be played on a laptop or TV screen during the event for a high-tech touch.
How do I print my sonogram photos larger?
Once you scan the photo at 300 DPI or higher, you can print it at 5x7 or 8x10 inches without losing much quality. Use a matte finish paper to reduce glare from party lights.
What is the best way to attach sonograms to a poster board?
Use photo-safe glue dots or acid-free double-sided tape. Avoid regular scotch tape, as the adhesive can yellow the paper over time if you are using copies you intend to keep.